Whale Charcuterie Board
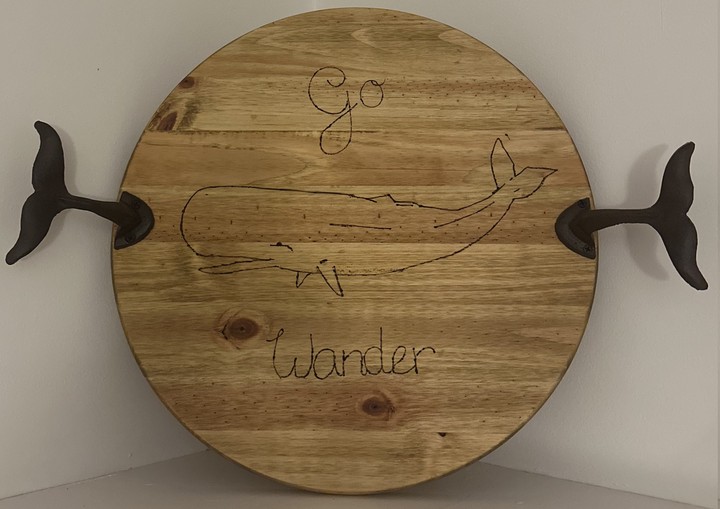
This is my first charcuterie board!
Table of Contents
Overview
- Start: Oct 14, 2023
- End: Oct 18, 2023
- Wood Species: Jack Pine
BOM
Sanding
Sanding was performed with the sanding block and 180 sanding paper. The edge of the board were sanded by hand to soften them.
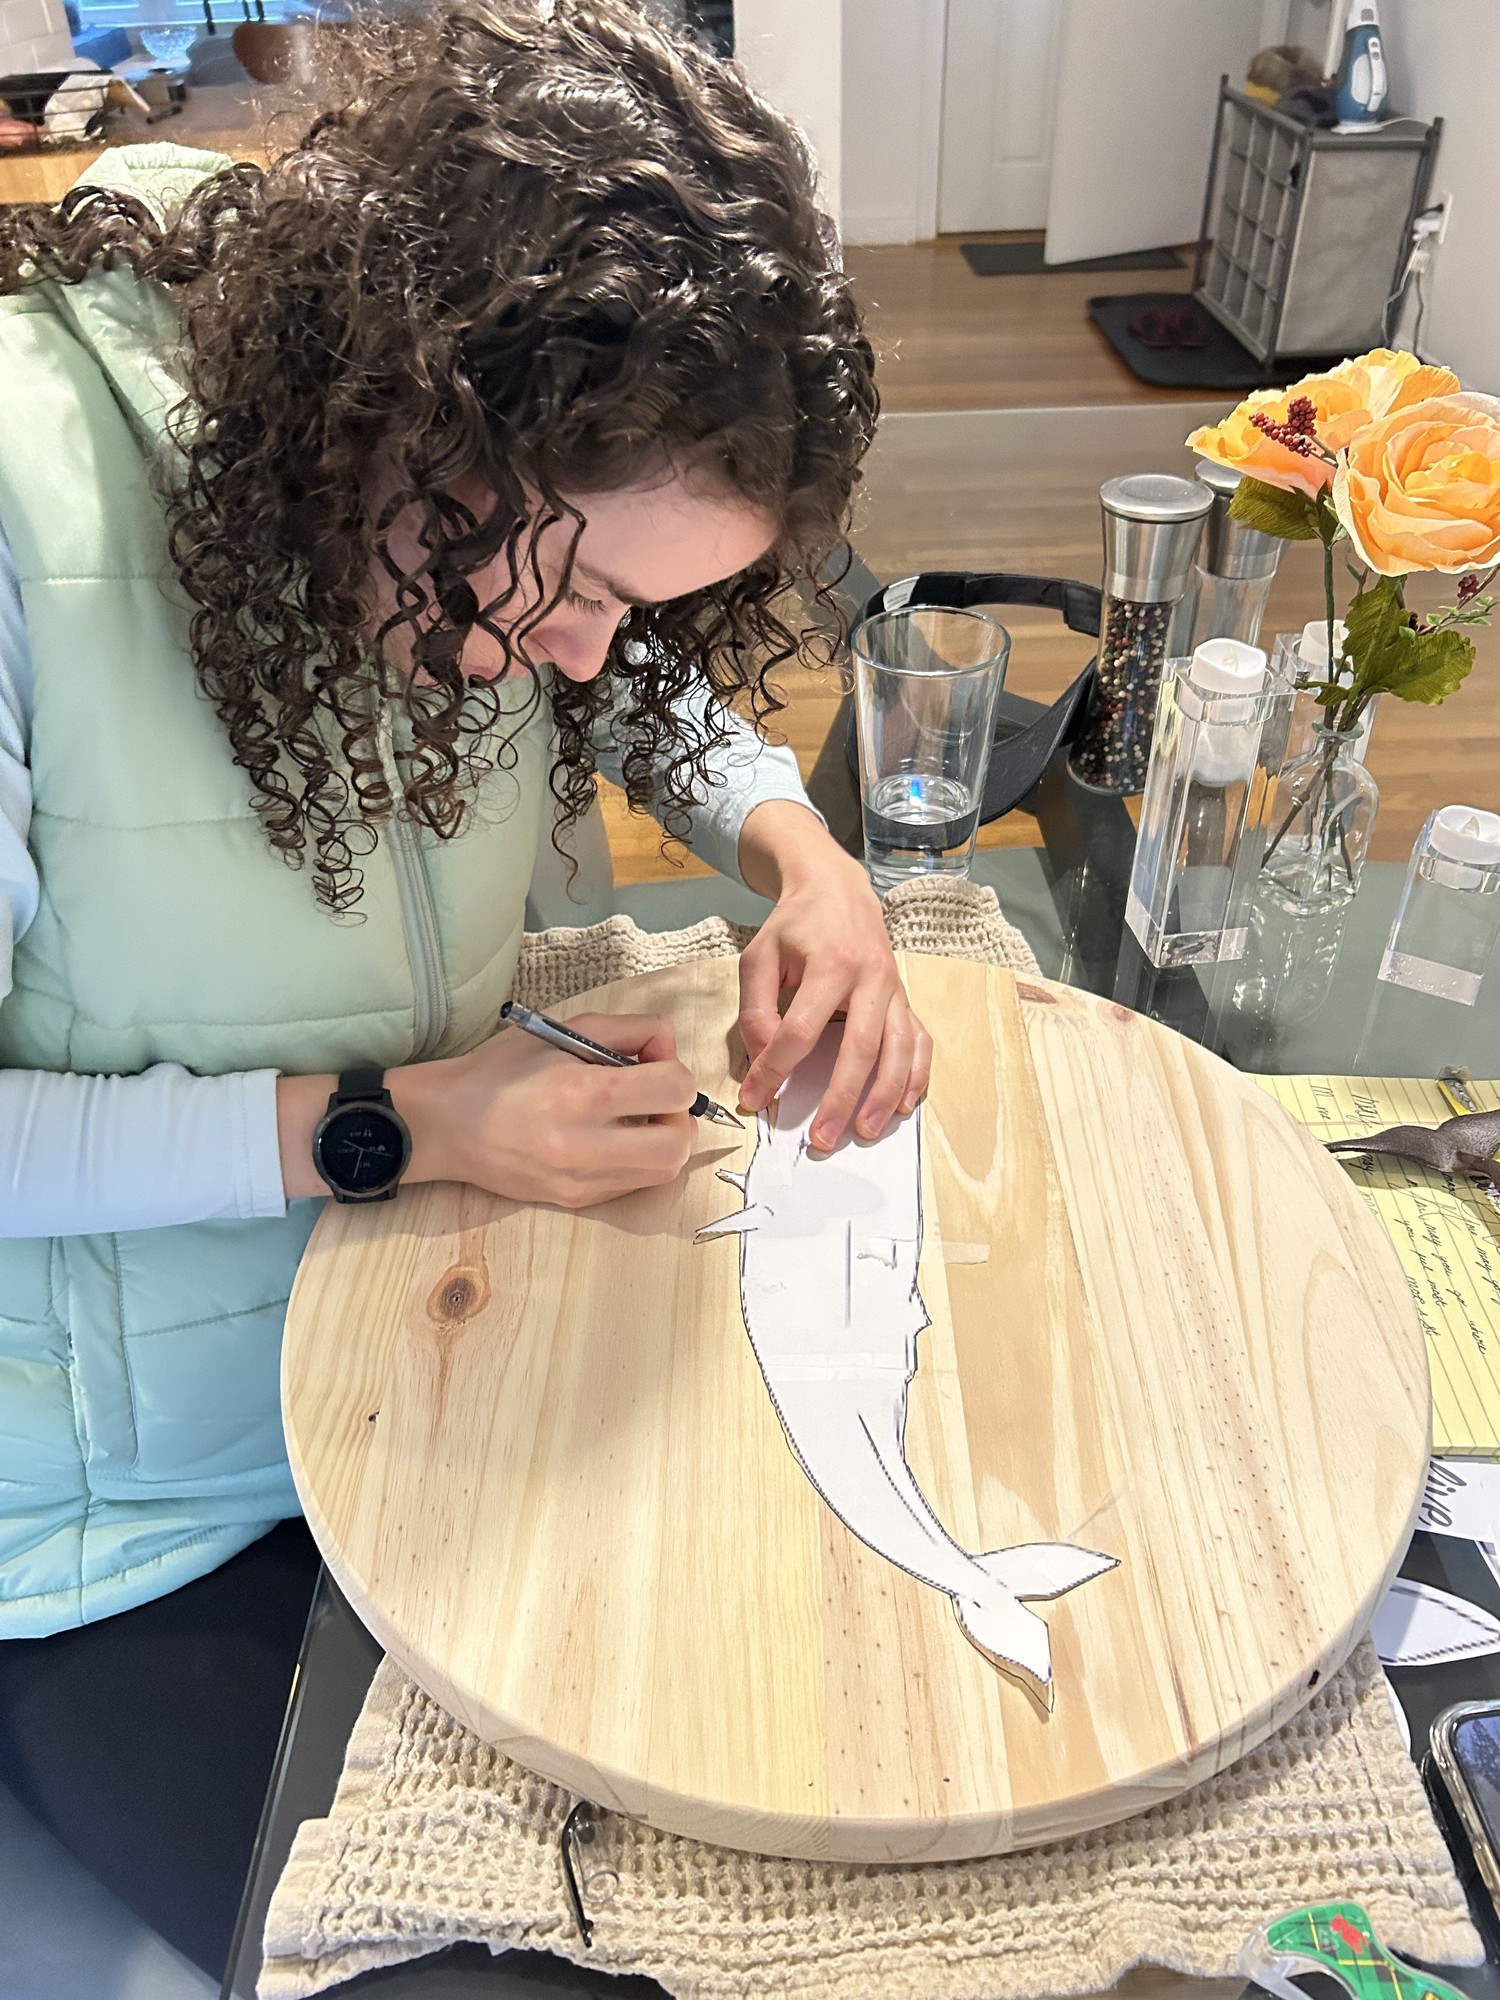
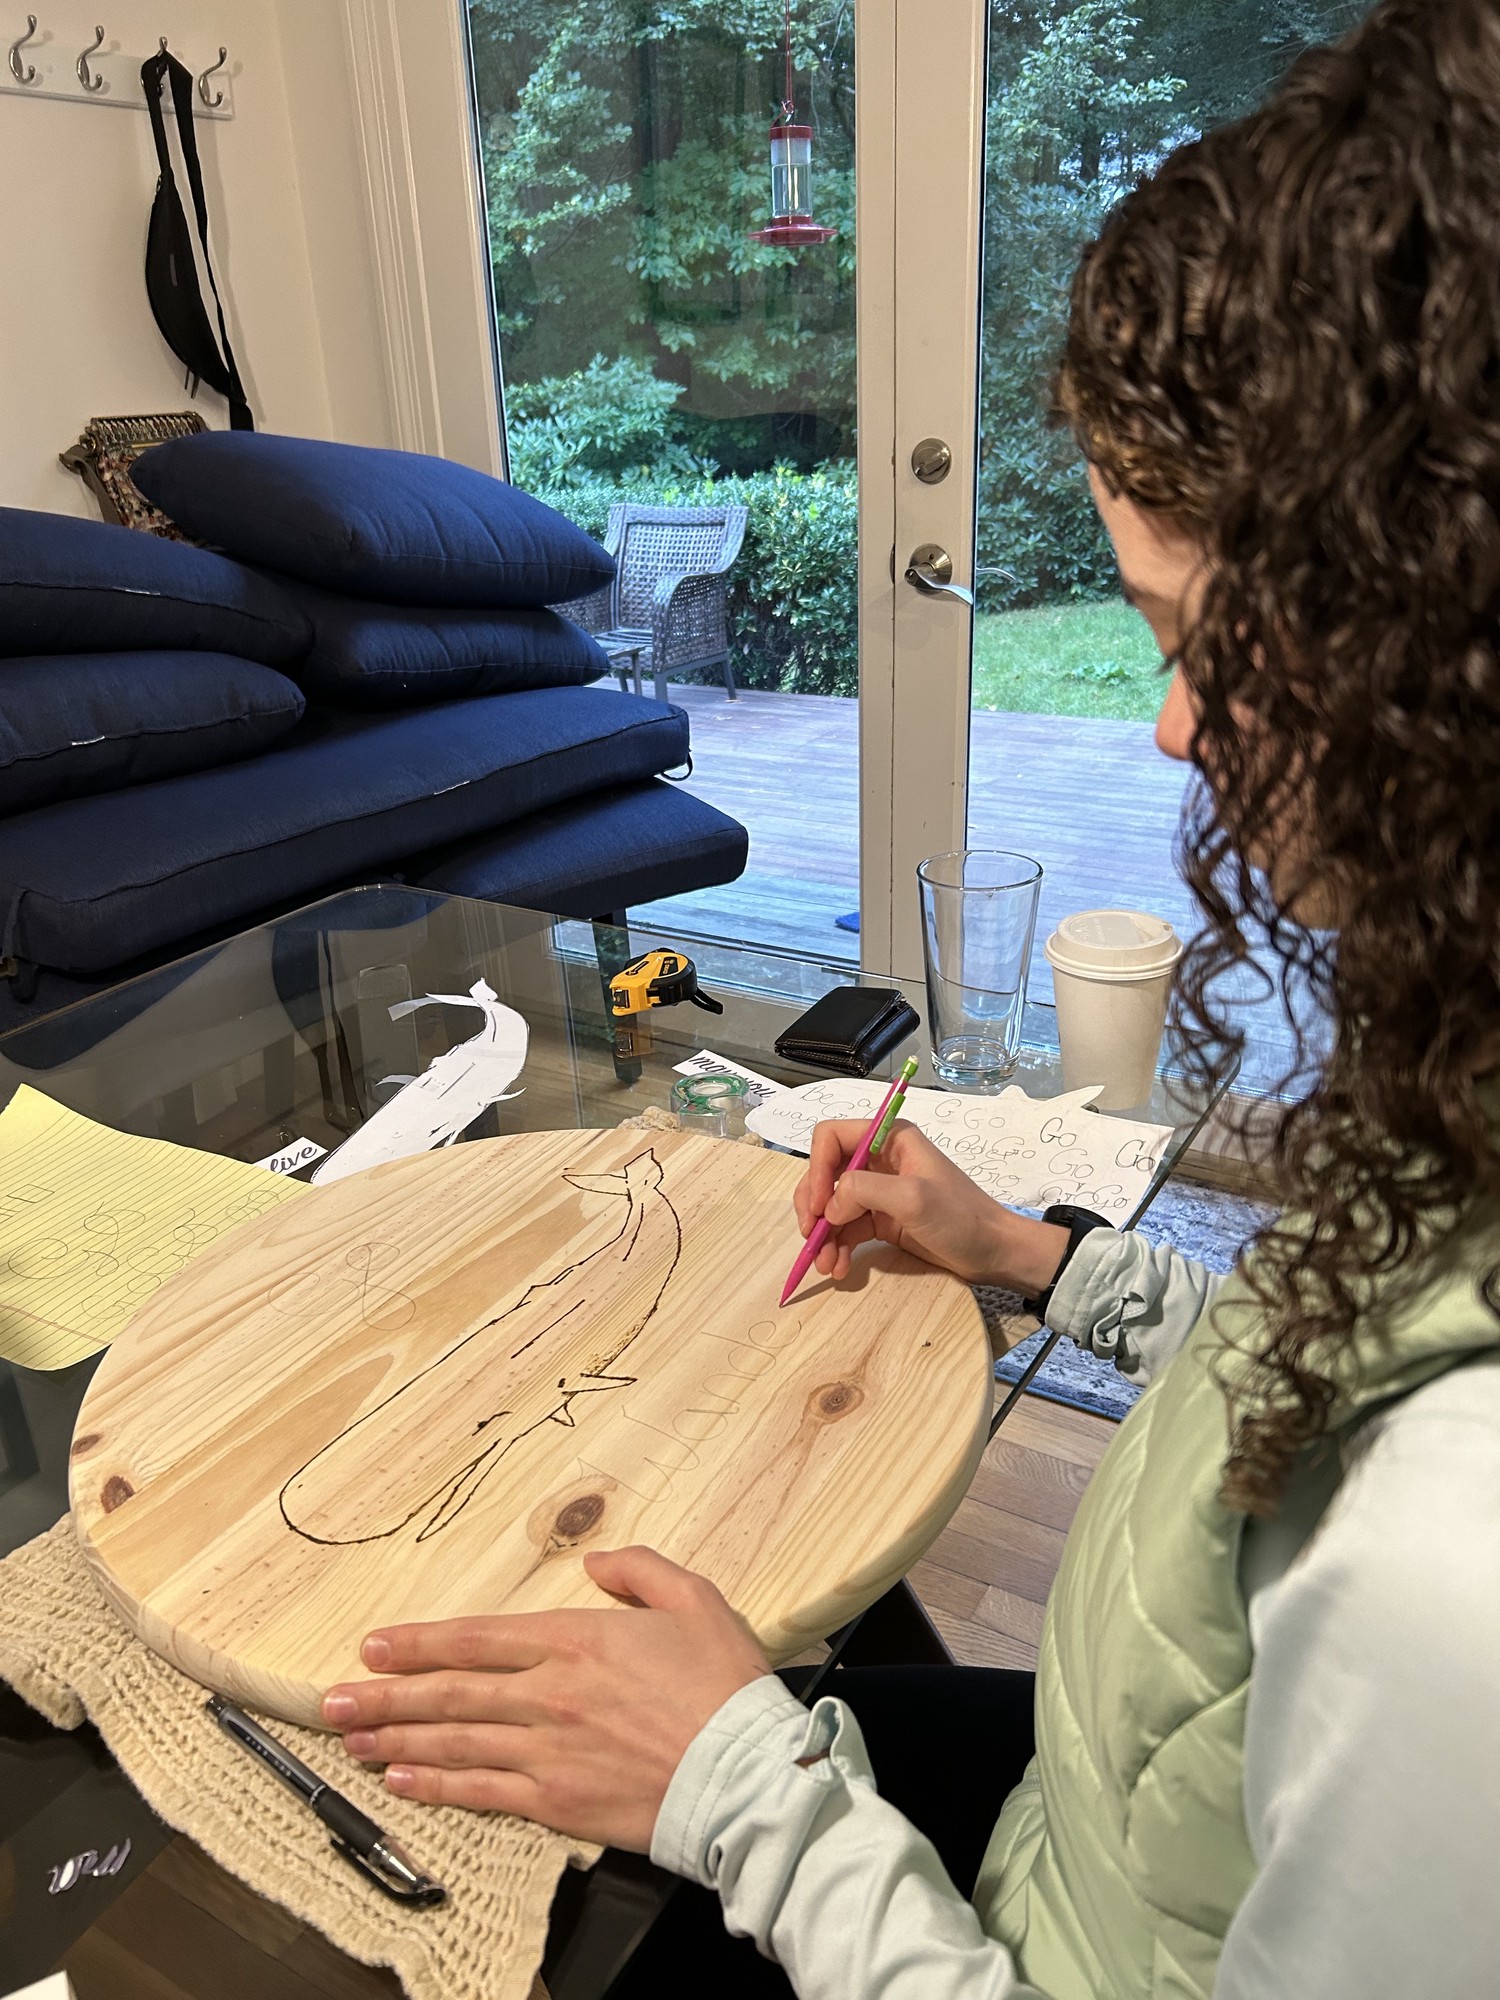
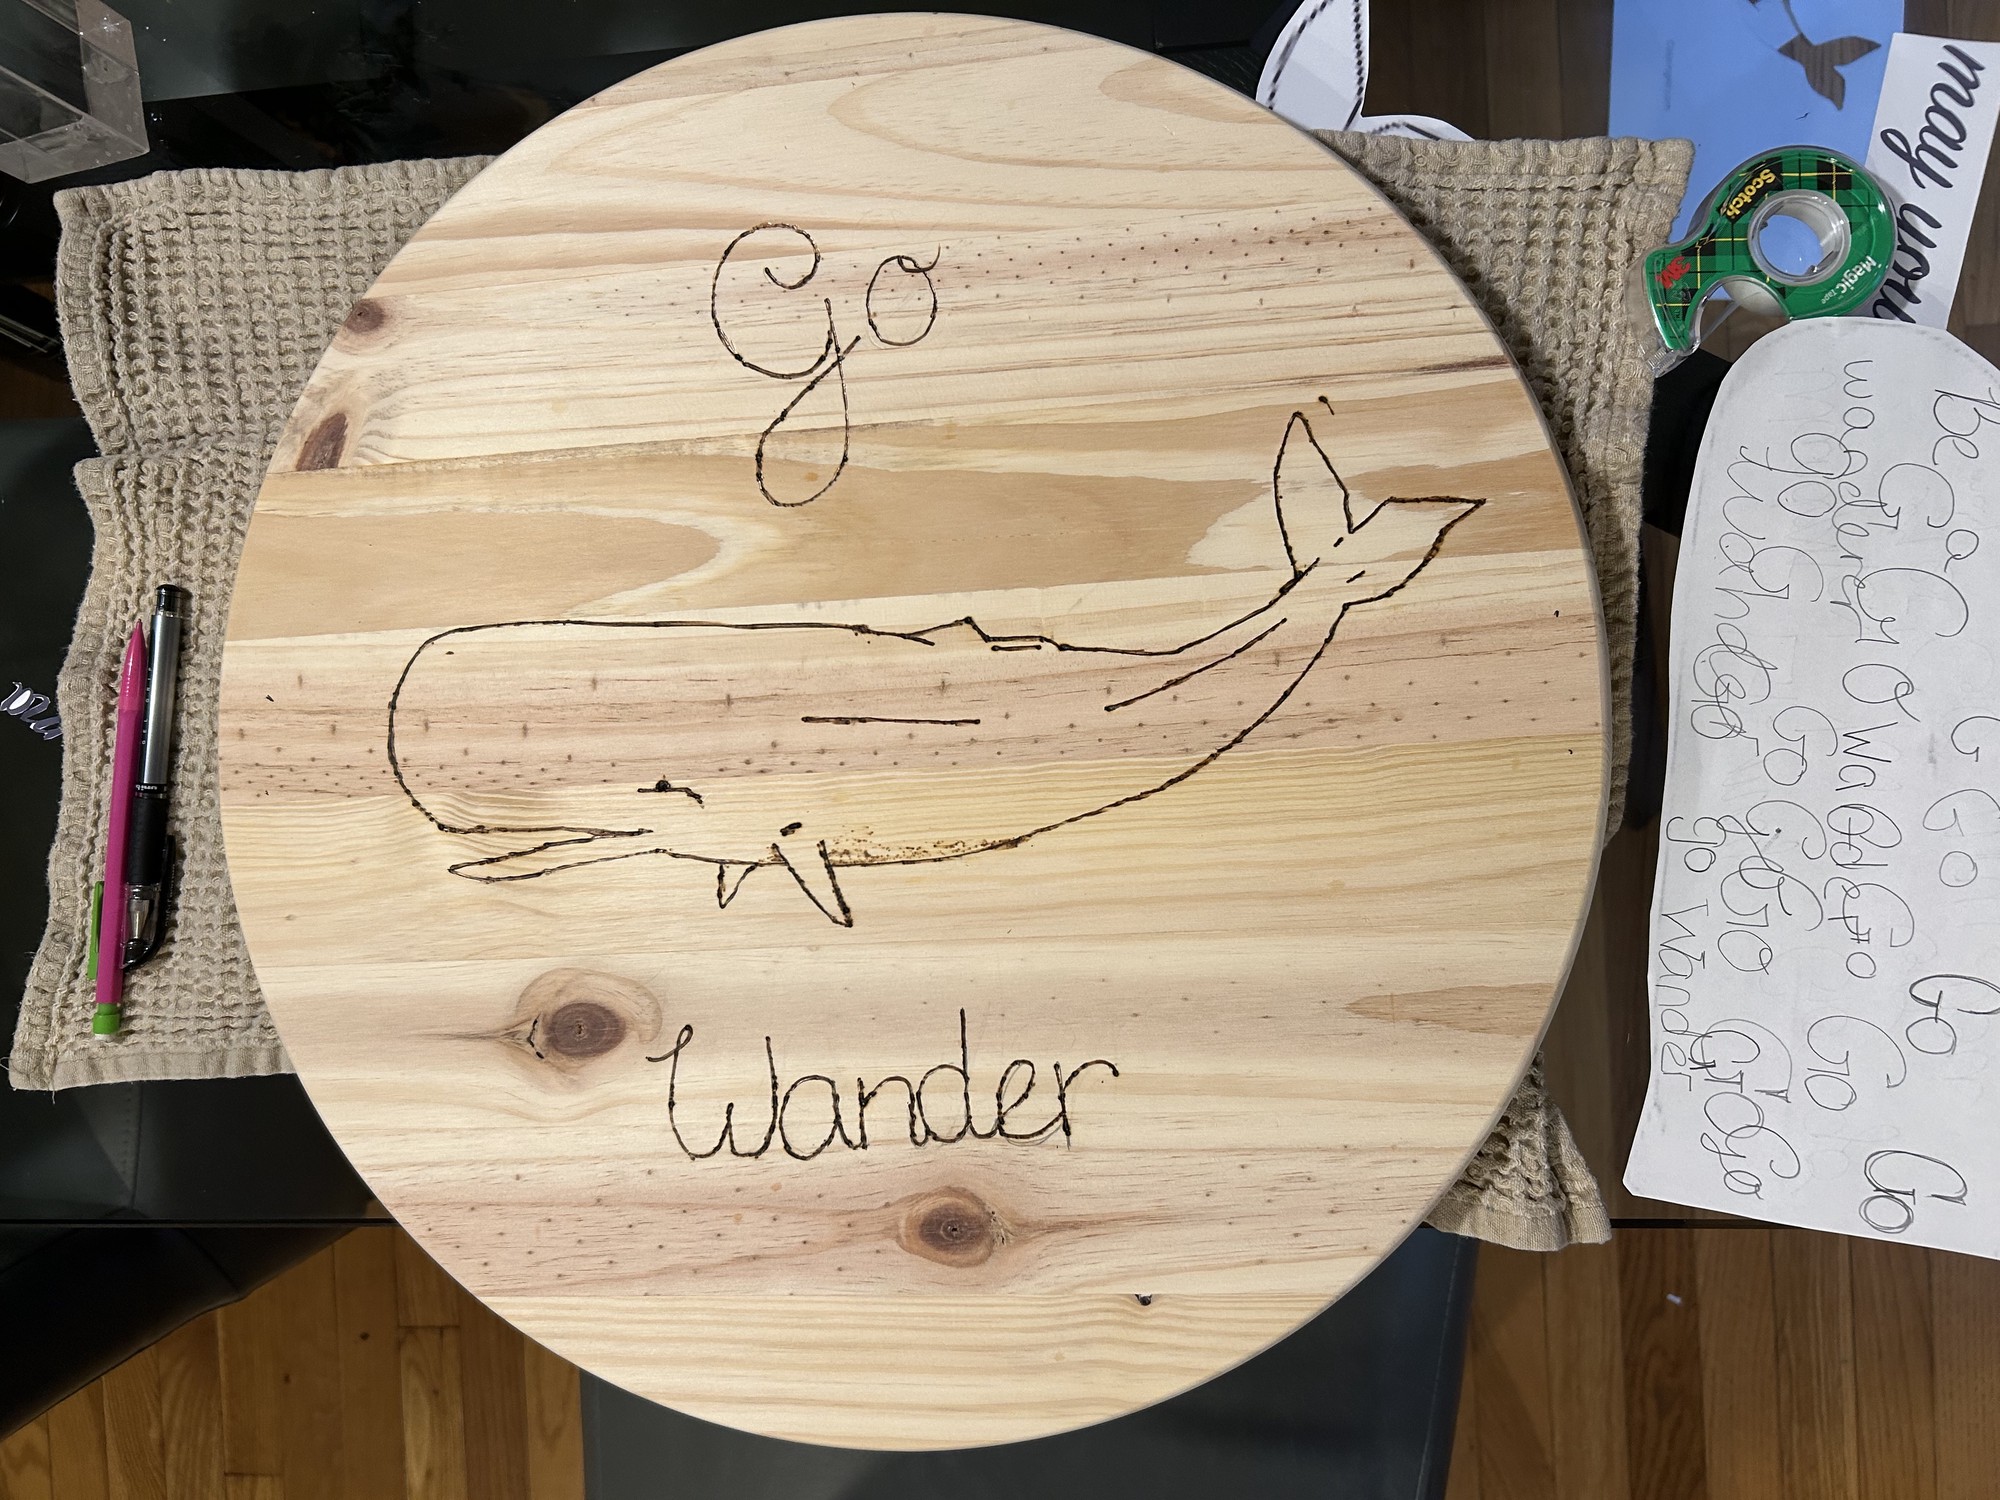
Drawing
A whale design found on the internet was first printed on printer paper. The design profile was then cut from the paper followed by etching its outline onto the board using pencil. The lettering was freehand drawn using pencil.
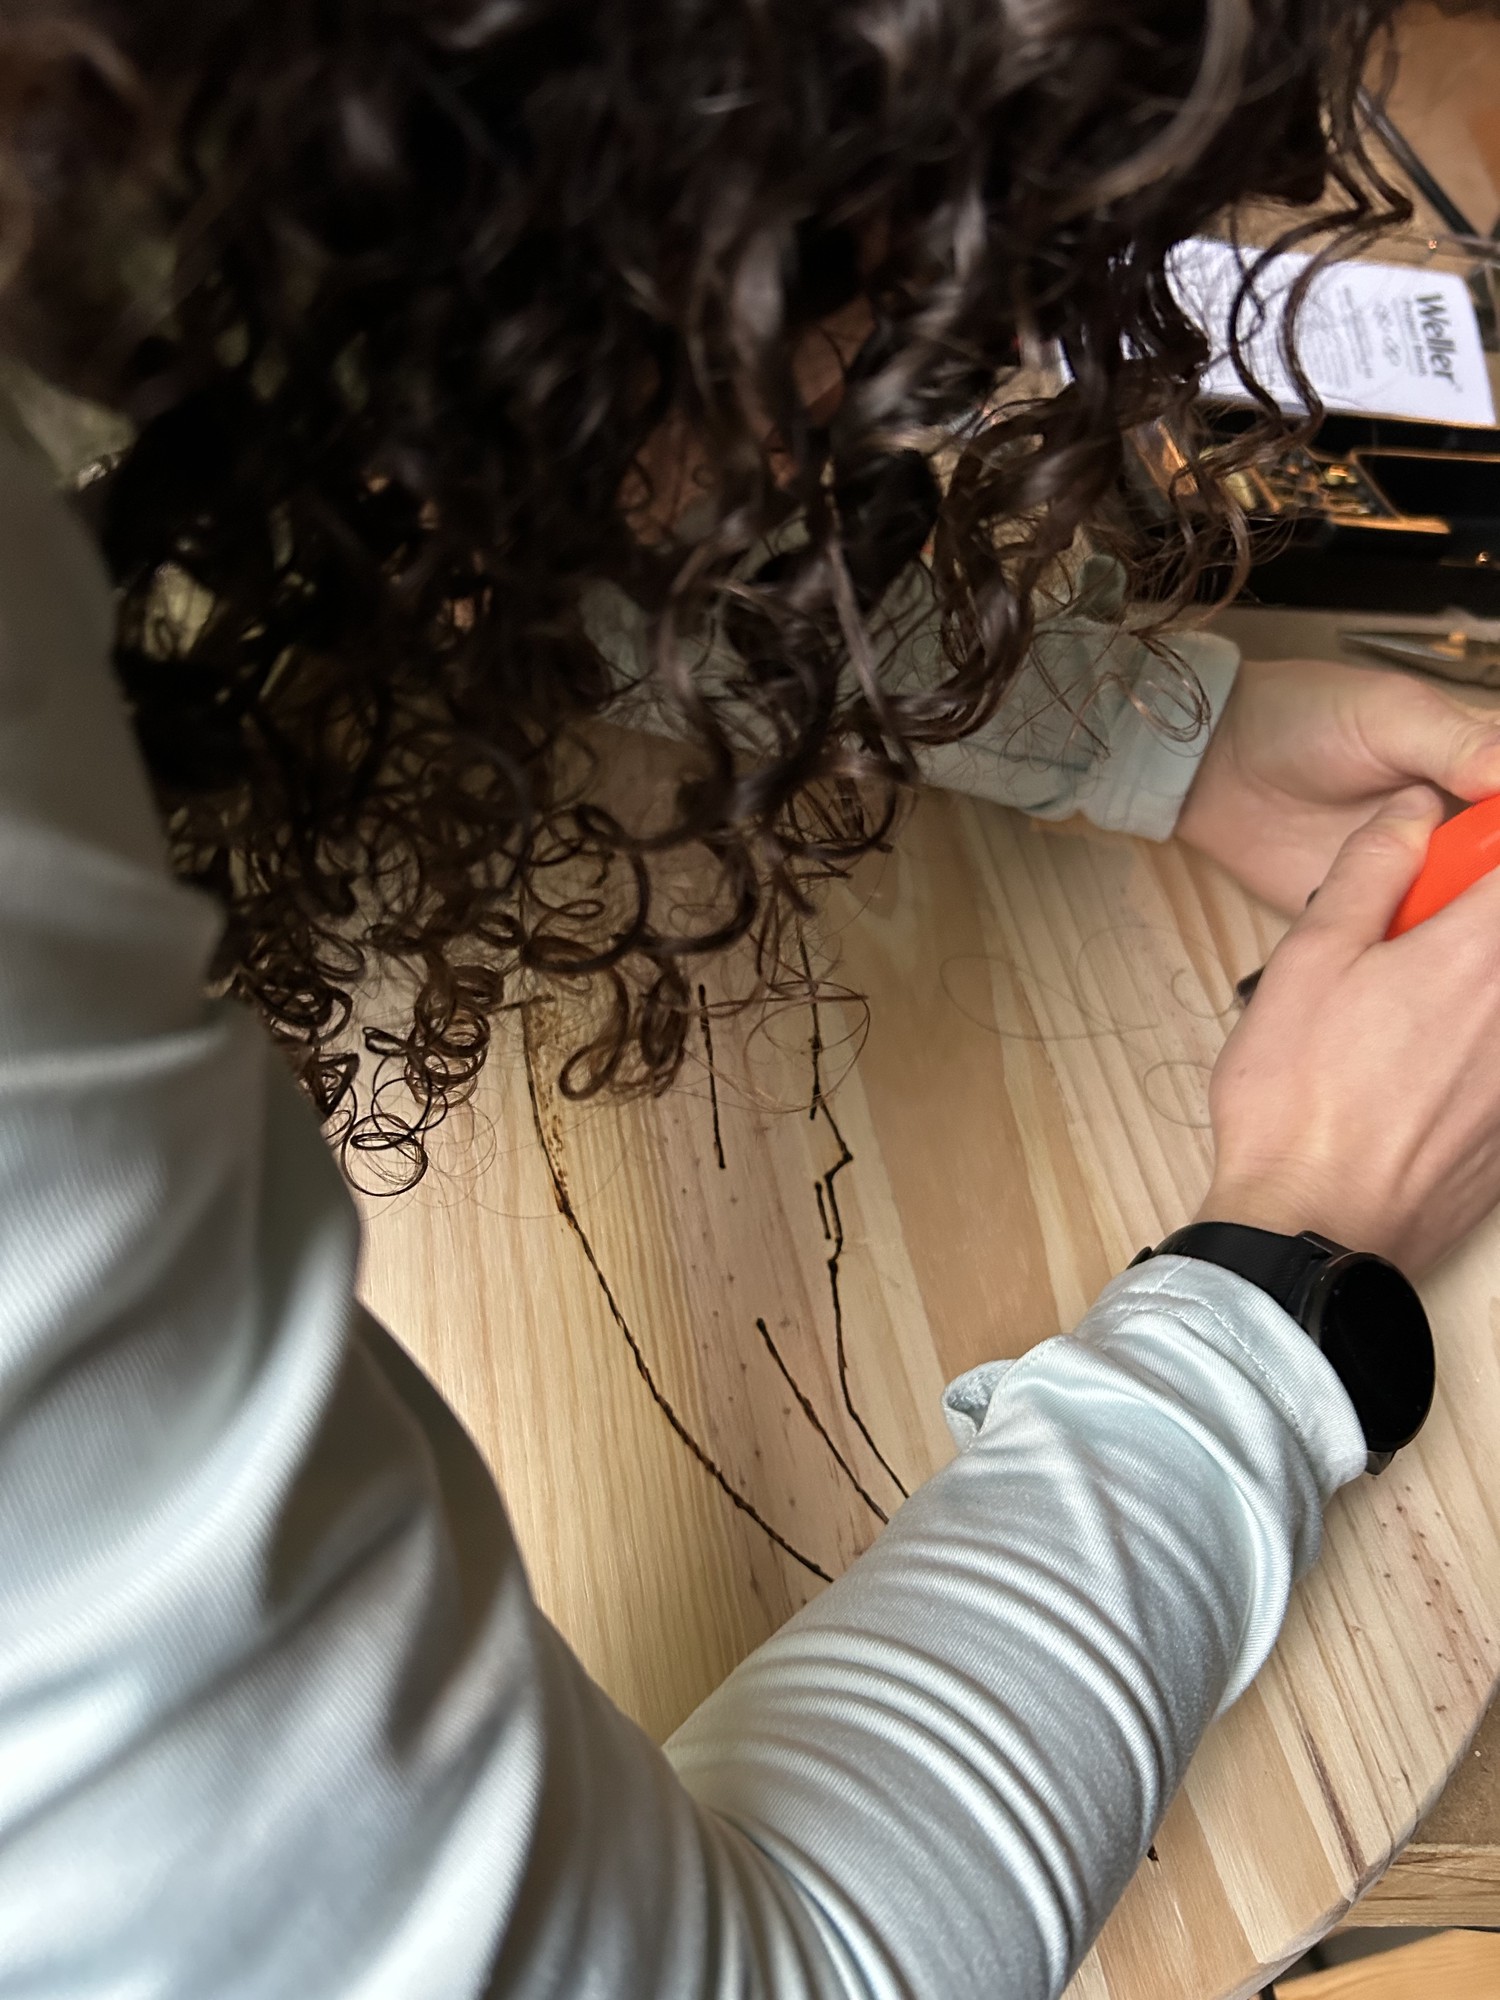
Wood Burning
The pencil outline was traced with a wood burning tool.
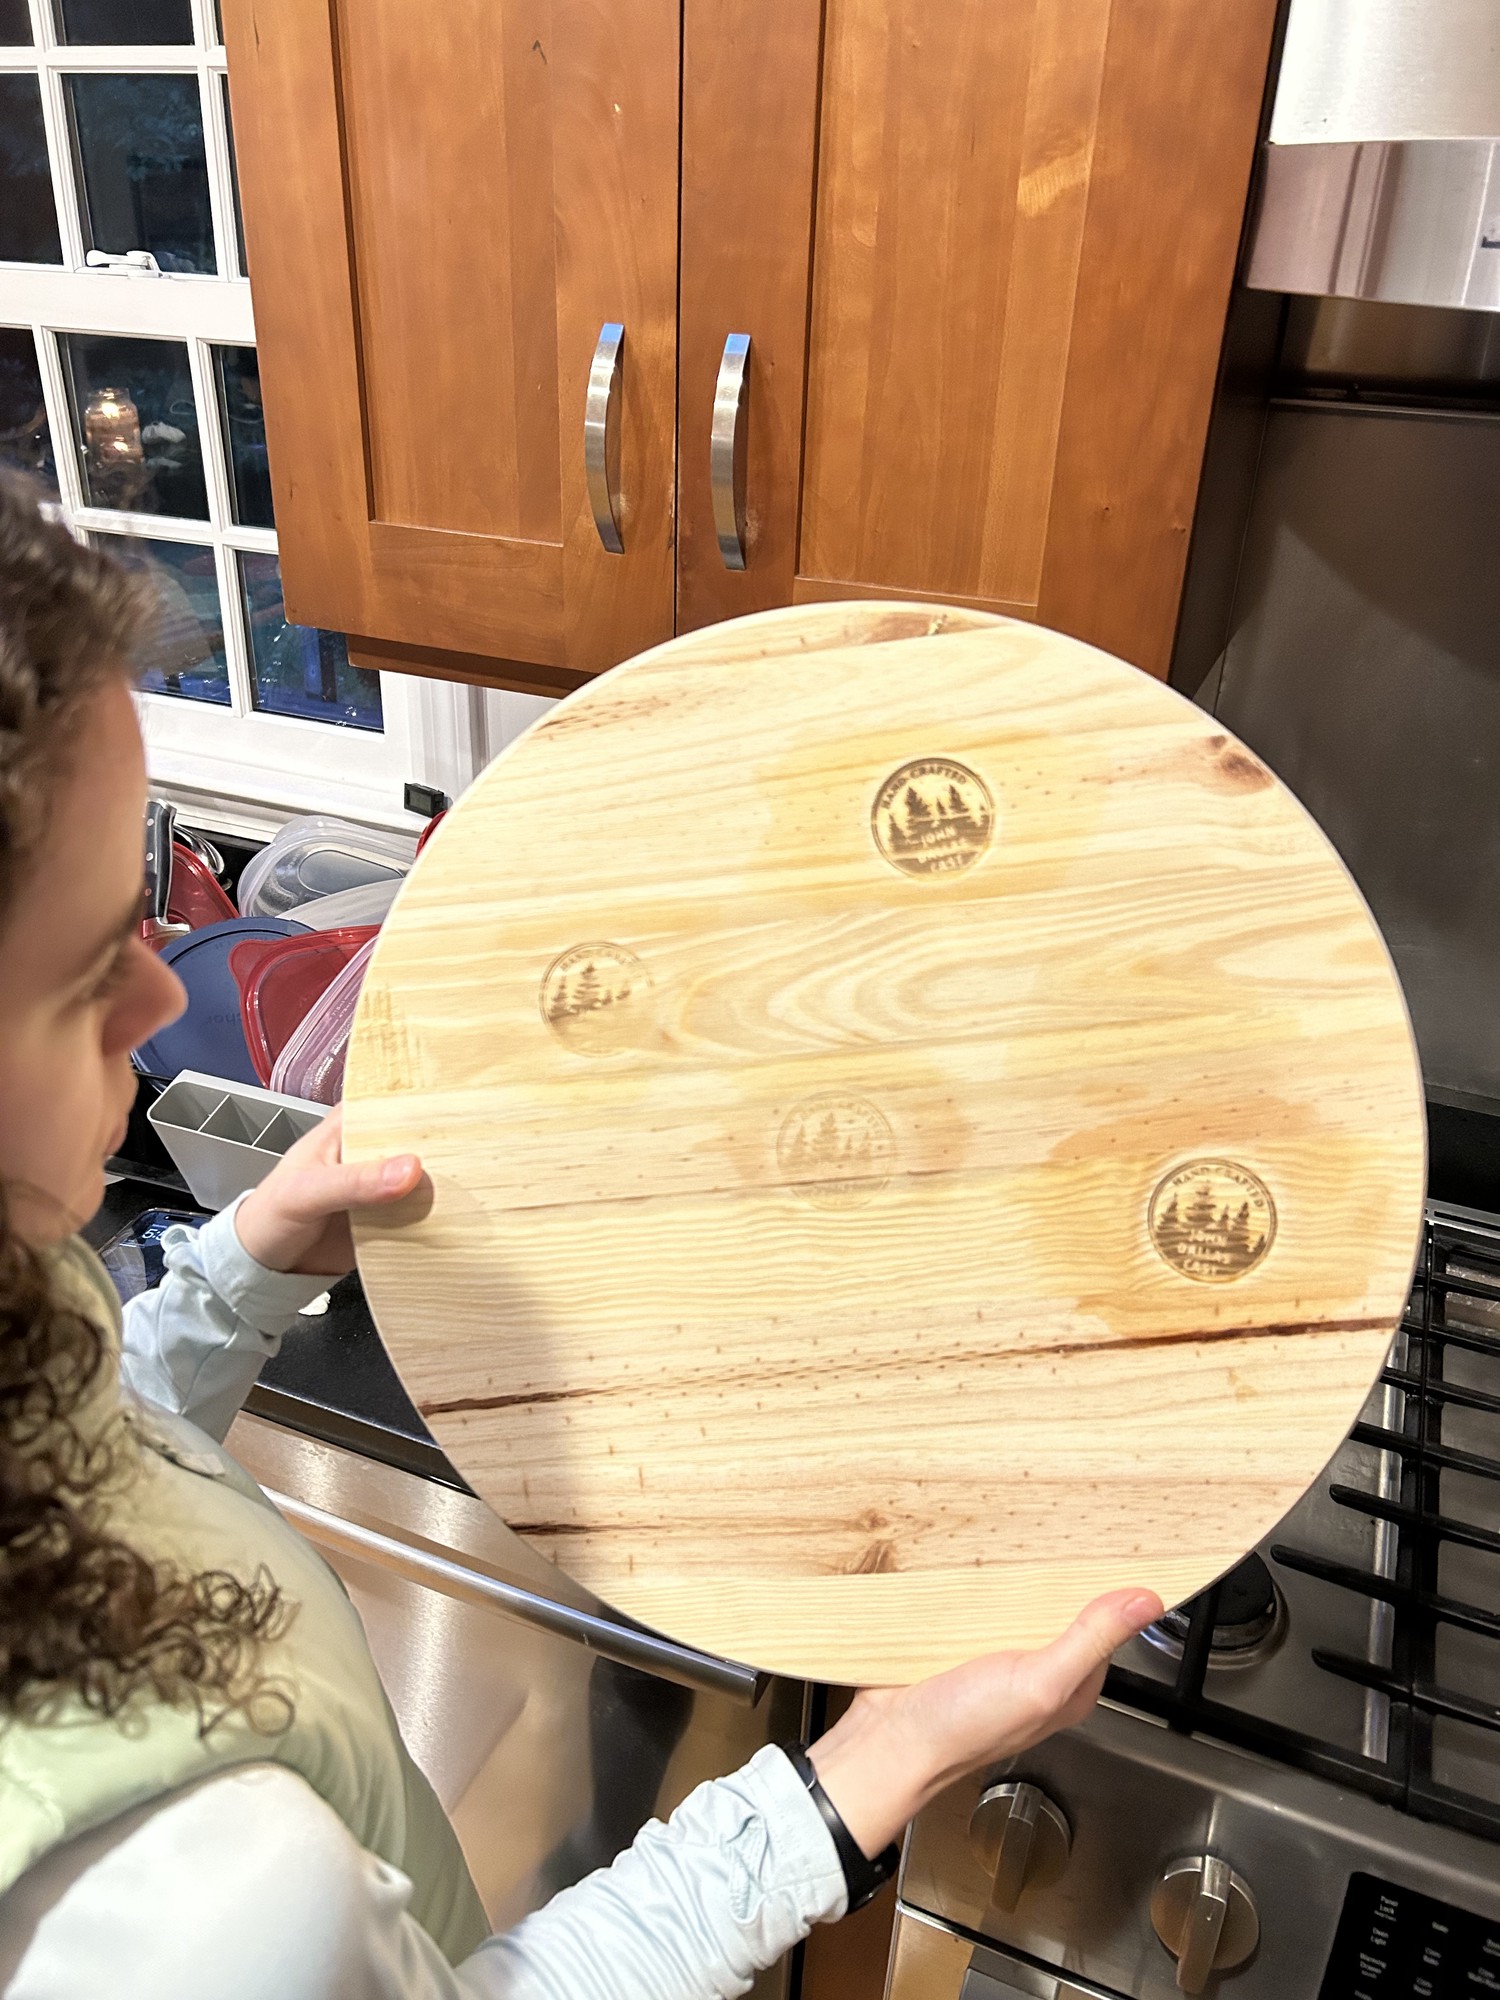
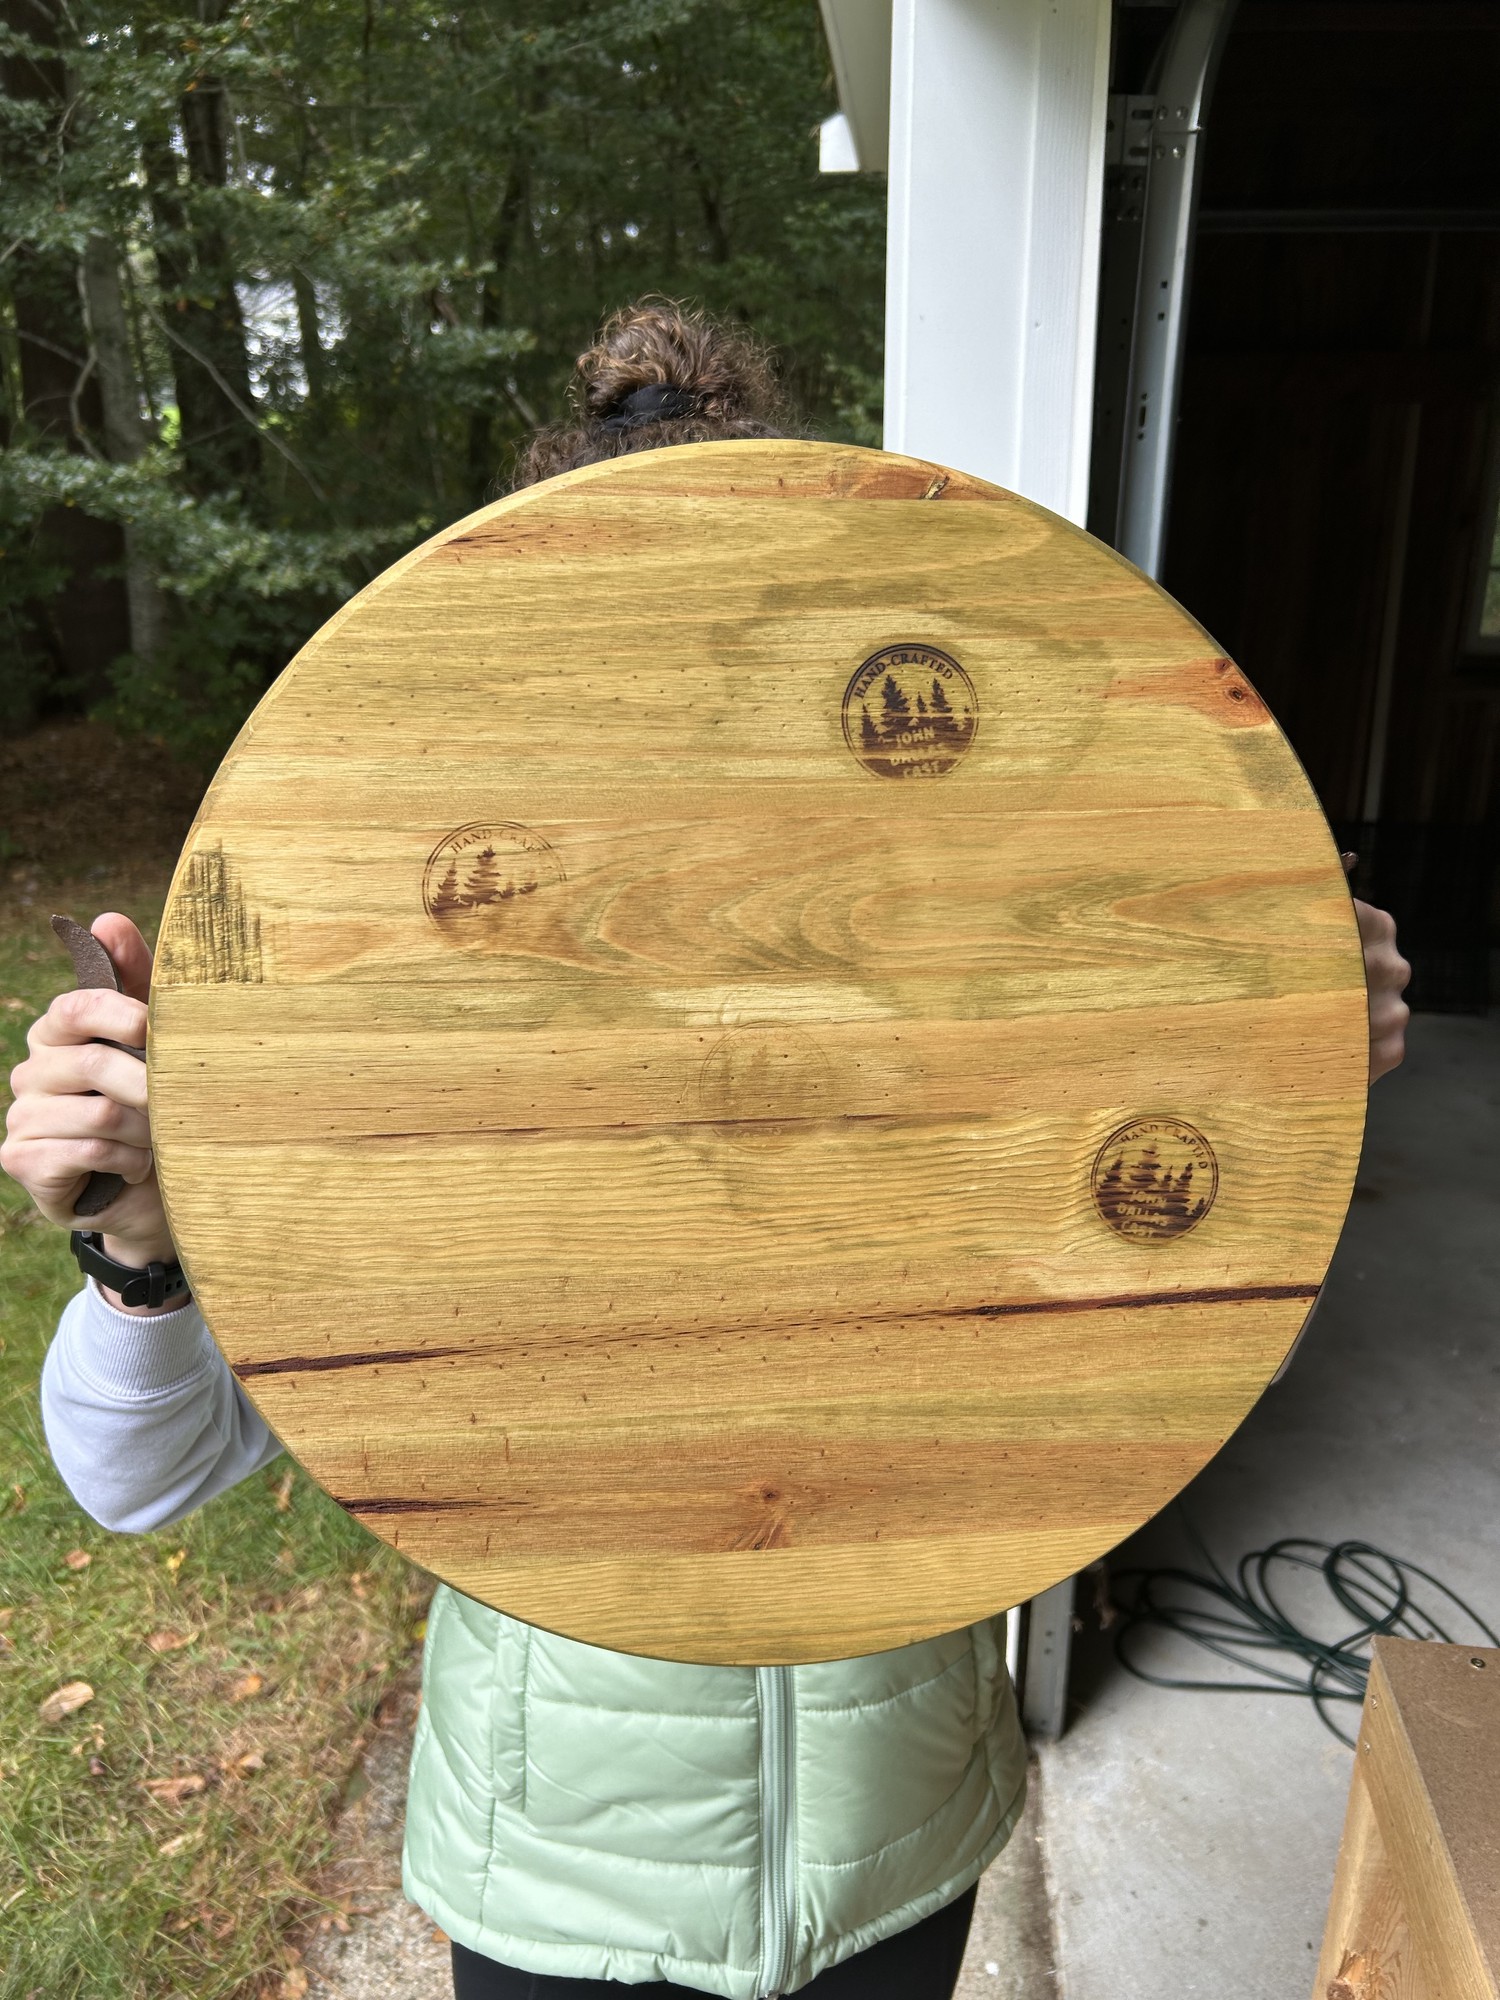
The signage was burned into the back of the board using a custom made branding iron.
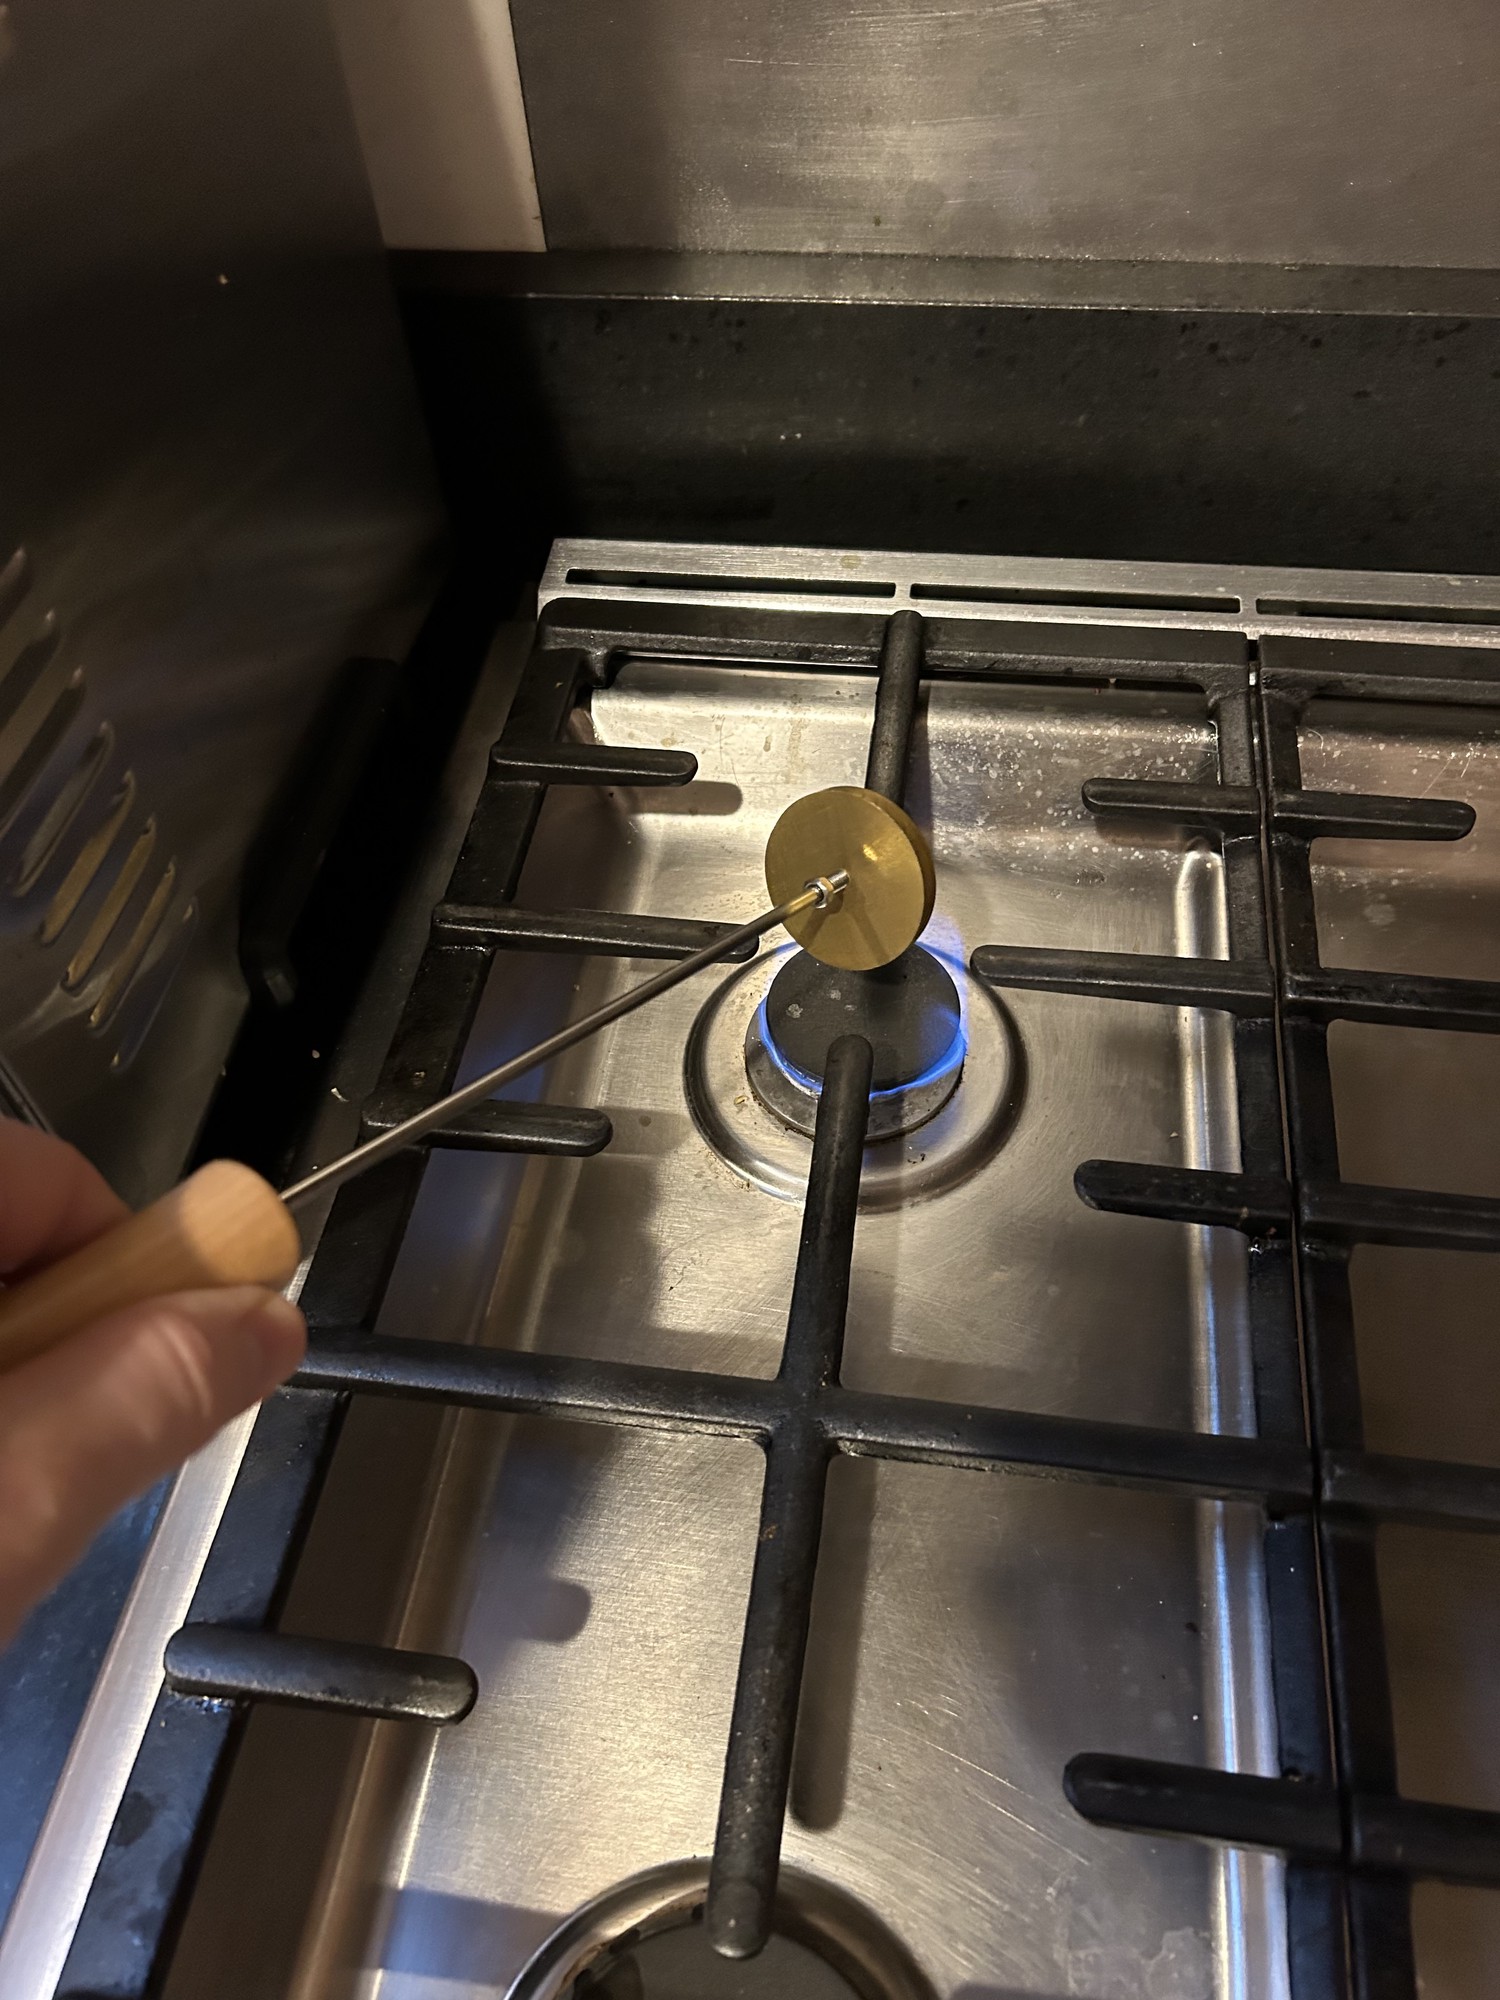
The iron was heated over a stove for ~2 minutes. The preferred spot was wetted just before applying the iron to conduct heat better and more uniformly.
The iron was left in contact with the wood for ~30 seconds.
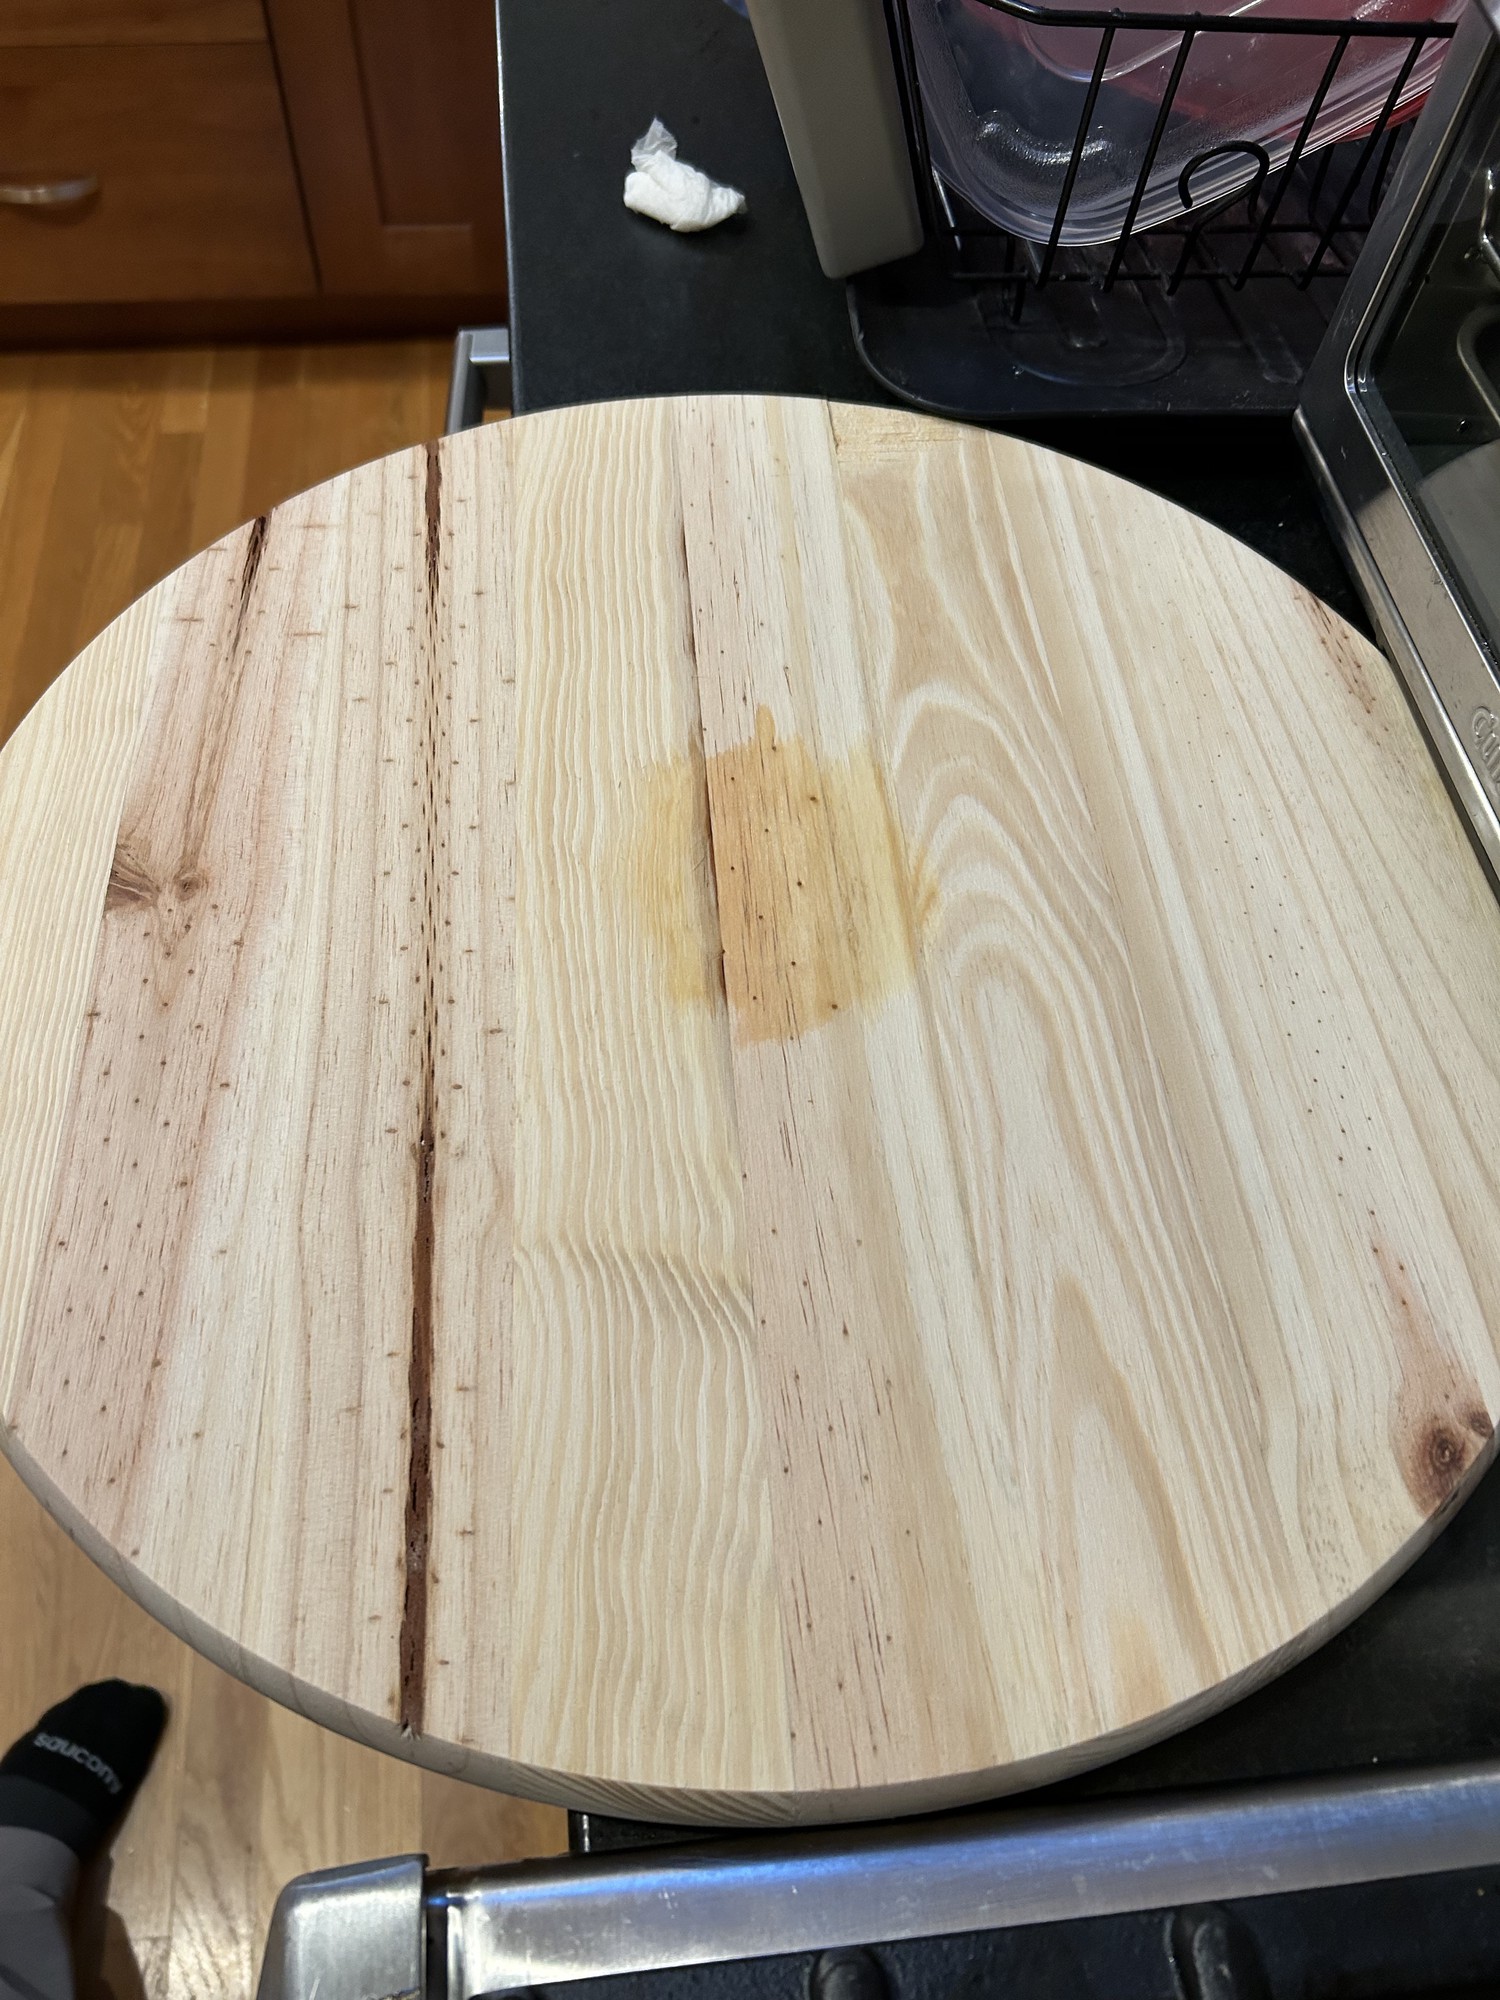
After several trials we finally had a successfully burn. Most of the failed trials were due to either the iron not being heated enough and/or the spot on the wood not being wet enough and/or the iron not left in contact with the wood long enough and/or the back of the board was not sanded.
Finish Coats
The last step was to apply finish to stain and protect the board as well as to enhance the chatoyancy of the board. For this I used Oak colored Rubio Monocoat6 following the instructions on the back of the can. This finish is highly respected in the woodworking community as it is in-grain, requires just one application that takes about 15 minutes to apply and once dried (after ~5 days), is food-safe.

Cheers!
-
https://www.amazon.com/Nylon-Abrasive-Wheel-Brush-Shank/dp/B07QDRCBBTs://www.homedepot.com/p/Edge-Glued-Round-Common-Softwood-Boards-1-in-x-17-3-4-in-Actual-1-0-in-x-17-75-in-ZPRLR0118/204510767 ↩︎
-
https://www.amazon.com/gp/product/B079SMYBMC/ref=ppx_yo_dt_b_asin_title_o05_s00?ie=UTF8&psc=1 ↩︎
-
https://www.amazon.com/gp/product/B07S1B12VR/ref=ppx_yo_dt_b_asin_title_o01_s01?ie=UTF8&psc=1 ↩︎
-
https://www.amazon.com/Dremel-445-grit-sanding-band/dp/B000WMIROM/ref=sr_1_4?dchild=1&keywords=dremel+drum+sander+220&qid=1619025626&s=hi&sr=1-4s://www.amazon.com/gp/product/B000EMBEY0/ref=ppx_yo_dt_b_asin_title_o07_s00?ie=UTF8&psc=1 ↩︎
-
https://www.amazon.com/gp/product/B00L8TII9C/ref=ppx_yo_dt_b_asin_title_o06_s00?ie=UTF8&psc=1 ↩︎